Have no idea about how to replace a shower temperature control valve? Well yes we know, Replacing a shower temperature control valve is something only some do regularly. Most people revere the shower temperature control valve and do not know how it works or how to change it.
The shower temperature control valve can be faulty in numerous ways, and if you cannot change it immediately, you may want to find out how to prolong its life. If your replacement is new, you need to learn about the type or model, so this guide might appear helpful.
To replace a shower temperature control valve, shut off water supply, remove the old valve, install the new one, connect pipes, and test for leaks.
Can You Replace the Shower Temperature Control Valve?
Shower temperature control valves can be replaced, but it’s a large job.
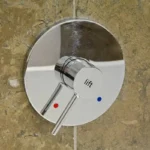
The shower temperature control valve regulates your shower’s water pressure and temperature. The problem may be causing your shower to be too hot or cold. There is a chance that your shower temperature control valve has gone bad and needs to be replaced.
Replacing a shower temperature control valve is more complex than replacing a light switch or an outlet cover plate. Homeowners can’t do it themselves, but it can be done. You’ll need a professional to replace your shower temperature control valve.
It takes two to four hours, depending on how old your current valve is and whether there are any complications.
Also Read: How Does A Shower Temperature Control Valve Work?
How To Replace A Shower Temperature Control Valve | Step By Step Guide
The shower temperature control valve is an integral part of your plumbing system. When it needs repair or replacement, it can cause serious problems. Now that you’ve decided to replace your shower temperature control valve let’s start!
Step 1: Shut off the water supply and drain the pipes.
Firstly you have to shut off the water supply. There are two ways to do this:
- Turn off the valve that controls your home’s main water supply line, or
- Shut off individual faucets throughout your house until you find the one connected to your shower valve. This may take some trial and error, but it will save time if only one faucet provides hot water in a particular area (say, at a kitchen sink).
- Drain out any remaining water from pipes by opening up all faucets and letting them run until no more flows out of them, then close them again once they’ve been drained completely dry.
Step 2: Access The Valve Through The Shower Wall.
Using a reciprocating saw, cut an access hole in the shower wall near where you can reach your hand to turn the valve. Use a drywall saw to cut through fiberglass or concrete wall panels (if necessary).
Make pilot holes with a drill bit slightly smaller than the threaded portion of your new temperature control valve–this will help prevent cracking or breaking as you install it.
Use a utility knife to cut through the remaining material between pilot holes until only about an inch remains on each side; then use pliers to remove any jagged edges from inside this opening so they won’t catch on anything when installing new parts later on.
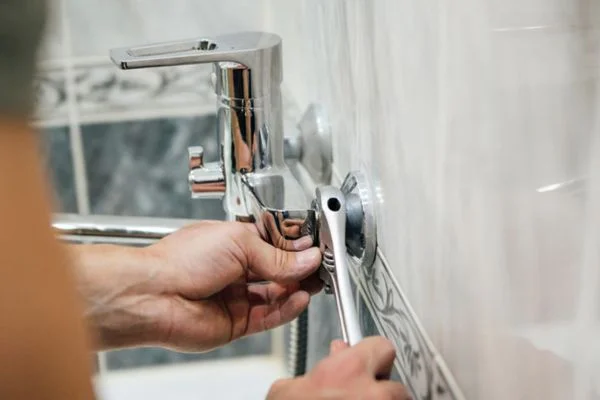
Step 3: Counterclockwise, Turn The Old Shower Control Valve Out.
Use a screwdriver for this step or a wrench if you have one handy. Be careful not to break your new valve as you loosen it from its place in the wall!
Step 4: Install A New Shower Temperature Control Valve
You can now install your new valve after removing the old one. First, insert it into the pipe and turn it clockwise until it’s snug against the pipe. When you’re tightening by hand, both sides of the valve are aligned and parallel with your wall. You don’t want any gaps between them!
Once everything is aligned correctly, use pliers or channel locks (or even an adjustable wrench) to tighten down on those nuts until they’re nice and tight.
But only a little so that they become difficult to turn by hand later on if needed during maintenance tasks. Like cleaning out drain plugs or checking for leaks under pressure conditions (which can happen if left unchecked).
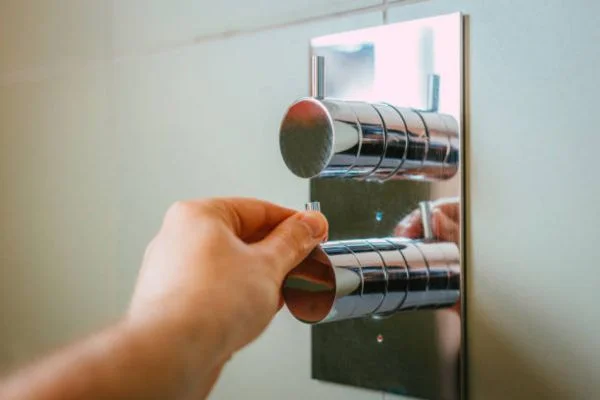
Step 5: Turn On The Water Supply And Check For Leaks
Turn on the water supply and check for leaks by running water through hot and cold lines for 15 minutes. Check under faucet spouts and connections where they meet with the valve cover plate or knob/handle assembly parts to identify any leaks as they may occur during the installation process. If there are no leaks at this point, continue with step 6.
Step 6: Reconnect Hoses
When you’re done, reconnect any hoses you disconnected during this project so that everything fits correctly before finishing up!
Also Read: How To Control Water Temperature In Shower?
Bottom Line
The shower temperature control valve repair is an important one. It would be best if you replaced the worn-out valves for it to function correctly. It’s crucial if you want your shower to be warm enough to give you good relaxation after a day’s work.
But like most plumbing repairs, this project can seem daunting if you have yet to do it. With all the right tools and instructions, however, it’s easy.
Just follow the steps above of our guide How To Replace A Shower Temperature Control Valve, and you can save time and money as you repair your shower temperature control valve.