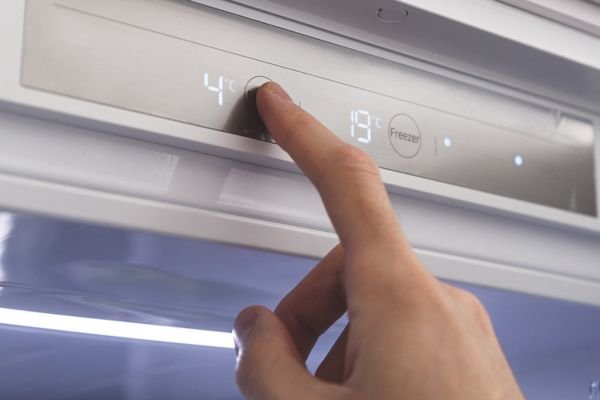
Your Kitchen Aid refrigerator is an essential household appliance, keeping your food fresh and cool. The fridge filter purifies the water and makes it safe for consumption. But this filter loses its calibration after some time and may stop working efficiently. You must calibrate your filter in order to maintain the quality and functionality of your refrigerator. We’ll walk you through the process of how to calibrate filter for Kitchen Aid refrigerator in this blog post.
To calibrate the water filter on a KitchenAid refrigerator, consult your user manual or follow on-screen prompts (if available) for resetting the filter status indicator. Typically, it involves holding the filter button for a specific time or until the indicator resets.
How To Calibrate Filter For Kitchen Aid Refrigerator | Step By Step Procedure
Step 1: Shut off the Water Supply
You must turn off the water supply to your refrigerator before calibrating the filter. The shut-off valve is in the basement or on the back of the refrigerator. Once you have found the valve, turn it anticlockwise to stop the flow of water.
Step 2: Remove the Old Water Filter
You must remove the old filter once you’ve shut off the water supply. Find the filter housing on the back of the fridge and rotate it anti-clockwise to remove it. Next, press the filter release button to remove the old filter. Dispose of the old filter.
Step 3: Install the New Water Filter
The new filter should be inserted into the filter housing after the protective cover has been removed. Rotate the filter housing clockwise to lock it in place. To fill the new filter and check that the water is flowing smoothly, turn on the water supply.
Step 4: Reset the Filter, Change Indicator Light
Your Kitchen Aid refrigerator has a filter change indicator light that alerts you when to change the filter. After replacing the filter, you need to reset the indicator light. Press and hold down the ‘Filter Reset’ button on your fridge until the indicator light turns green.
Step 5: Run Water through the Filter
Finally, run a few gallons of water through the new filter to eliminate air pockets and ensure the water flows correctly. Dispense and discard the first two glasses of water to ensure that the water is clear and odourless.
Also Read: Does Refrigerator Filter Remove Fluoride?
Where Is The Reset Button On My Kitchenaid Refrigerator?

Firstly, let us tell you that not all KitchenAid refrigerators have a reset button, so it is essential to know your particular unit’s model number. Check your owner’s manual or the technical sheet to tell whether your refrigerator has a reset button.
If your KitchenAid refrigerator has a reset button, it is usually located on the control panel of the fridge. The control panel is often located on the top right side of the fridge’s interior compartment. It is a small button labelled with “Reset” or “Restart.”
In some refrigerator models, the reset button may not be labelled. In that case, look for a prominent button on the control panel. If you cannot locate the reset button, check the owner’s manual of your refrigerator model to find its precise location.
Now that you know where the reset button is, how do you reset your refrigerator? Press and hold the button for three to five seconds before letting go.
You should notice all the fridge settings resetting one after the other. The restart of your refrigerator’s operation could take a few seconds. The timing may vary depending on your unit, so be patient and monitor the temperature inside your fridge.
Wait at least 24 hours after resetting your refrigerator before checking its effectiveness. To make sure they are maintaining the recommended temperature you have selected, check the temperature in the refrigerator and freezer compartments.
Also Read: Can I Get An Rv Refrigerator With A Ice Maker?
How Do I Flush My Kitchenaid Water Filter?
Depending on your water quality, the Kitchenaid water filter should be flushed every 1-3 months.
To flush the filter:
1. By releasing the hose clamp with a screwdriver or pair of pliers, you can shut off the tap and separate the cold water supply line from the dispenser’s base.
2. Use a bucket to catch any remaining water in the reservoir. If you have an optional ice maker, you’ll need to disconnect it before draining any remaining water out of it.
3. Once all of this is done, open up your refrigerator door and locate where your water supply line attaches underneath it. There may be two hoses here—one going into each side of the refrigerator (one for cold water, one for hot). These hoses connect directly to your main water supply line, so don’t disconnect them while flushing your filter!
4. Flush out all of your old filter’s sediment by attaching an empty bucket under where these hoses connect and then turn on both valves at once (you may want someone else there with you so they can help open them). This will flush out any sediment that is inside those pipes which could have built up.
Also Read: Can You Refrigerate Biscuit Dough Overnight?
Bottom Line:
Now you know how to calibrate filter for kitchen aid refrigerator. Calibrating your Kitchen Aid refrigerator filter is essential to the quality and efficiency of your appliance. You can make sure your water filter is adjusted correctly and producing clean, fresh water by following these easy steps.
Remember to change the filter every six months to maintain the quality of your water. By doing this, you’ll increase the lifespan of your appliance and avoid paying for unneeded repairs. Happy filtering!


