

Have no idea how to build a waterproof TV enclosure? And want to build a waterproof TV enclosure? Bingo, you’re in the right place!
Many different types of wood can be used for this project, but we recommend cedar. It’s affordable, easy to work with and durable enough for outdoor use. Here in this blog post, we will guide you on building a waterproof TV enclosure with just a bit of effort.
How To Build A Waterproof TV Enclosure | Step By Step Procedure
Step 1: Choose The Right Kind Of Wood
When it comes to wood, you have two options: plywood or solid wood. Plywood is a composite material made from layers of glued-together pieces of timber that have been pressed flat. The benefit of using plywood is that it’s waterproof and can be nailed together without any problems.
On the other hand, solid wood may rot over time if exposed to moisture for too long; this means you’ll need to seal it before building your enclosure and then again after finishing off with paint or varnish (which also acts as a sealant).
Plywood has another advantage over solid boards in that they come pre-primed–this means there are already coatings applied to prevent damage from water penetration during construction work (and later).
If you’re building something large enough where cost becomes an issue, consider using 2x4s instead because these materials cost less than 1x6s but provide similar structural support for any given project size.
Also Read: How To Waterproof Tv For Bathroom?
Step 2: Choose A Waterproof Sealant
If you’re putting your TV in a location that gets wet, like a garage or a bathroom, it’s important to use a waterproof sealant. Several different types of sealants are available on the market today: silicone sealant, polyurethane foam sealant and caulk (a type of silicone), and adhesive.
- Silicone Sealants: This type of material is flexible and can stretch without breaking down over time like some other options described below will do if they get wet repeatedly for long periods (like when exposed to moisture). They also tend not to yellow over time, which means less discolouration around your TV enclosure once installed correctly!
- Polyurethane Foam Sealants: These types of products are best used when there won’t be much movement inside the enclosure itself. Because their adhesive properties aren’t as strong as those found within other types, such as silicone-based products. However, they should hold up well enough under normal circumstances if applied properly. Such as walking across top surface areas occasionally throughout daily use/activity levels etc.
Step 3: Cut Your Pieces
Now that you have all your materials, it’s time to work! The first step is cutting the pieces to size. If you don’t have a mitre saw, we highly recommend using one–it will make this process much faster and easier.
Be sure to measure twice (and then check again) before making any cuts so that everything fits together properly later. If you’re working with wood, don’t damage any edges when making cuts. Use an electric saw or power tool rather than hand tools like an axe or hatchet.
Because these tend not only to cause more splinters but also leave behind visible marks, which could be seen through an enclosure later on if they were not sanded down first.
Also Read: Is It Safe To Put A Tv In The Bathroom?
Step 4: Measure And Drill Holes For The Tv Mount
The next step is to measure and drill holes for your TV mount. Make sure you have enough space between each bolt and enough room for the bolts themselves.
You also want to ensure that the holes are placed in an area that won’t interfere with any other parts of your enclosure, like the door or window frames.
If you’re using a wall-mounted bracket like this one from Amazon (which we recommend), once again, check its instructions carefully.
So that you can be sure about how far apart from each other your bolts should go based on how wide or deep your wall studs are:
Step 5: Attach The Bottom Piece To The Front, Sides And Back
Now that you have all the pieces cut, it’s time to attach them. First, apply wood glue to the inside edges of each piece and then connect them with clamps. Leave these clamps on overnight to dry completely before moving on to the next step!
Step 6: Attach The Sides To The Bottom Piece
Attach the sides to the bottom piece using a cordless drill and Allen wrenches. If you don’t have a cordless drill, use an old-fashioned screwdriver instead.
Step 7: Install The Tv Mount Mounting Plate
Attach the mounting plate to the wall with screws and anchors, if needed. Attach a bolt/screw (or nut) through each hole on your TV mount and into the two holes in your enclosure, then tighten them securely with an Allen wrench (or cordless drill).
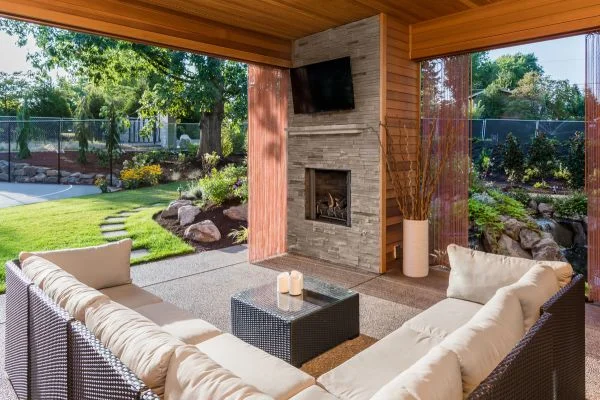
Now You Have A Waterproof Tv Enclosure
Now you have a waterproof TV enclosure you can use outside in the rain. You will be able to watch TV outside without worrying about water damage or theft, and your entertainment will also be safe from vandalism.
Now that you’ve built your outdoor TV enclosure enjoy some time with family and friends!
Also Read: Do I Need A Waterproof Tv For Bathroom?
Bottom Line
If you follow these steps of how to build a waterproof TV enclosure, you can build a waterproof TV enclosure. It’s a great project that will last years and protect your electronics from spills and other damage. If you have any questions or comments, please leave them below!

