So, Do camera lens protectors affect quality? Yes, camera lens protectors can affect image quality if poorly installed or made of low-quality materials. However, high-quality lens protectors, such as those made from tempered glass or optical-grade plastic, have minimal impact on image quality and maintain the lens’s original optical performance.
What Is A Phone Camera Lens Protector?
A phone camera lens protector is a thin, transparent accessory designed to safeguard the camera lens on a smartphone. It is typically made from durable materials like tempered glass or high-quality plastic.
The protector adheres directly to the camera lens without obstructing the image quality or functionality. By using a phone camera lens protector, users can maintain the clarity and performance of their smartphone camera and ensure it remains protected from potential damage.
Read more about How to Prevent Camera Lens from Fogging at Night?
How Do Lens Protectors Change Picture Quality?
While they serve a protective purpose, it’s essential to acknowledge that they can have some impact on the picture quality. Several factors contribute to how lens protectors can change the image quality captured by a smartphone camera.

You should know how camera lens protectors affect quality. Many people want to ask, do camera lens protectors affect quality? So, let’s explore these factors in detail:
Unclean Area During Installation Can Damage the Lens:
Dust particles or dirt trapped between the lens and the protector during installation can scratch the camera lens when pressure is applied to attach the protector. This accidental damage can lead to long-term image quality issues and may necessitate replacing the phone’s camera module.
Lens Protectors May Not Be Installed Perfectly:
The way a lens protector is installed can significantly impact image quality. If it’s not precisely aligned or has air bubbles trapped underneath, it can cause distortion or reduced sharpness in photos. Proper installation is crucial to maintain the lens’s original optical properties and ensure the protector doesn’t interfere with the camera’s performance.
Scratches on the Glass Will Be Noticeable:
If the protector accumulates scratches, they might become visible in photos and videos taken with the smartphone camera, reducing image clarity.
Specific Lens Protectors Diminish Image Clarity:
The optical quality of lens protectors varies depending on their material and manufacturing process. Some protectors might degrade the image clarity by introducing slight blurriness or reducing the sharpness of the images. High-quality protectors are designed to minimize this impact and preserve the lens’s optical performance.
Low-Quality Protectors Turn Yellow Over Time:
Lower-quality lens protectors might undergo discoloration over time, particularly when exposed to sunlight or heat. The yellowing effect can alter the color balance of images, resulting in a warmer or less accurate representation of colors.
High-quality protectors are less prone to this issue and maintain transparency over time. Now you know the answer to “Do camera lens protectors affect quality?”
Read more about How To Remove A Camera Lens Protector?
How to Choose the Right Lens Protector Material
Choosing the ideal lens protector material depends on your specific needs and preferences:
Image Quality Priority: If uncompromised image quality is your top concern, opt for tempered glass or optical-grade plastic protectors. They offer the best clarity and transparency.
Durability and Flexibility: A hybrid or high-quality optical-grade plastic protector may be a good choice if you frequently use your camera or phone in rugged environments. They provide decent protection and flexibility.
Budget-Friendly Option: If you’re on a tight budget and don’t require top-tier image quality, an acrylic lens protector can offer essential protection.
Proper Installation Matters
Regardless of the lens protector material, proper installation is critical to avoid any negative impact on image quality. Follow these guidelines:
Cleanliness: Ensure the camera lens is thoroughly cleaned before applying the protector. Dust or debris trapped between the protector and lens can affect image clarity.
Alignment: Precise alignment is essential, especially for cutouts that need to match camera features. A misaligned protector may obstruct the lens and affect image composition.
Bubble Removal: During installation, eliminate any air bubbles trapped between the protector and lens. Bubbles can distort images and reduce sharpness.
Regular Maintenance
Keep your lens protector clean to maintain optimal image quality. Periodically remove the protector, clean both sides, and reapply it carefully. Replace the protector if it becomes severely scratched or damaged.
Read more about Does Camera Lens Protector Affect Picture Quality?
How To Properly Install Lens Protectors And Avoid Image Quality Issues
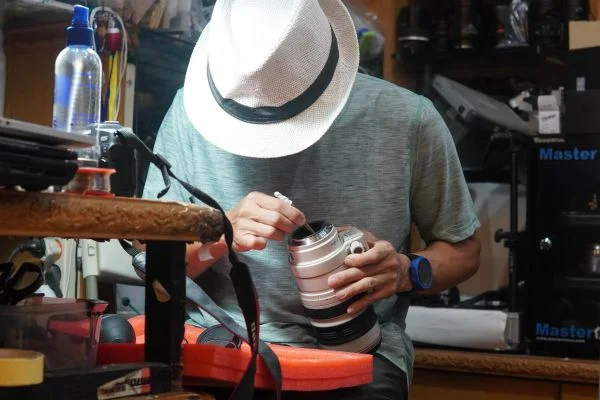
As a photography enthusiast, you know how crucial your camera lens is for capturing stunning images. A lens protector must be installed to ensure its longevity and preserve image quality.
Gather Your Supplies
Before you start, gather all the necessary supplies to ensure a smooth installation process. You’ll need:
- Camera lens protector: Choose a high-quality protector made of tempered glass or optical-grade materials for the best results.
- Microfiber cloth: This will clean the lens before installation, ensuring no dirt or debris between the lens and the protector.
- Lens cleaning solution: Use a mild lens cleaning solution or lens cleaning wipes to remove stubborn stains or fingerprints from the lens.
Step-by-Step Installation Guide
Follow these simple steps to install the lens protector accurately:
Step 1: Clean the Lens
Use the microfiber cloth and lens cleaning solution to clean the camera lens gently. Ensure no smudges, fingerprints, or dust particles are left on the lens surface. A clean lens will result in a better bond with the protector.
Step 2: Position the Protector
Carefully remove the adhesive backing from the lens protector. Align the protector with the lens, ensuring the openings match perfectly with the lens elements and camera sensors. Most protectors have specific cutouts for features like autofocus points, so pay close attention during alignment.
Step 3: Smooth Out Bubbles
Once the protector is in position, lightly press it from the center outward to allow air bubbles to escape. If any bubbles persist, use a soft cloth to gently push them towards the edges until the surface is smooth and bubble-free.
Step 4: Double Check Alignment
After smoothing out the bubbles, double-check the alignment of the protector. Ensure it sits symmetrically and covers the entire lens surface. Minor adjustments can be made before the adhesive fully sets.
Step 5: Let It Settle
Allow the lens protector to settle for a few minutes. During this time, the adhesive will bond securely with the lens surface. Avoid using the camera or removing the lens cap during this waiting period.
Tips to Avoid Image Quality Issues
Whether an amateur or a seasoned pro, image quality issues can be frustrating and hinder your creative expression. Fear not! Let’s dive in!
Clean Your Lens Regularly: Sparkling Starts Here!
A dirty lens is the number one culprit behind blurry and lackluster images. Removing smudges, fingerprints, and dust particles will ensure that your lens captures clear and sharp shots, giving your photos that wow factor!
Mind Your Exposure: The Light’s Dance Floor!
Proper exposure is vital for stunning photos. Use your camera’s exposure compensation feature to adjust brightness when necessary. Additionally, explore the histogram, a graphical representation of the image’s exposure, to make precise adjustments and achieve that perfect balance of light and shadows.
Steady as She Goes: Embrace Tripods!
Handshake-induced blur is a common image quality issue, especially in low light or when using long exposures. Invest in a sturdy tripod to stabilize your camera and prevent unwanted motion blur.
Auto vs. Manual Focus: Focus Like a Pro!
While autofocus is convenient, it may not always lock onto your desired subject. Learn to use manual focus to take control of your composition and ensure critical elements are perfectly sharp. Use focus peaking or magnification aids in your camera to help you nail that focus every time.
Watch Your White Balance: Colors Speak Volumes!
Incorrect white balance can cast an undesirable color tint on your photos, making them appear unnatural. Be mindful of the lighting conditions and adjust the white balance settings accordingly. Experiment with different white balance presets or use a custom setting to capture true-to-life colors.
Choose the Right ISO: Sensitivity Sensations!
ISO determines your camera’s sensitivity to light, affecting image noise and overall quality. Consider higher ISO values (e.g., ISO 800-3200) in low light situations, considering that it may introduce some noise, but it’s better than missing the shot altogether.
Keep Your Sensor Clean: Dust Busters!
Dust on your camera’s sensor can lead to dark spots or blemishes in your images, especially when using small apertures (high f-numbers). Clean your sensor regularly using a sensor cleaning kit to ensure spotless photos. If you need more confidence in doing it yourself, take it to a professional for sensor cleaning.
Beware of Digital Zoom: The Pitfall of Pixels!
Digital zoom may seem tempting, but it sacrifices image quality by cropping and enlarging the photo. Stick to optical zoom whenever possible to maintain image clarity and avoid pixelated results.
Use Lens Hoods: Sun Shield Superheroes!
Lens hoods protect your lens from accidental bumps and shield it from stray light. Stray light can cause lens flares and reduce image contrast.
Shoot in RAW: The Power of Post-Processing!
RAW files contain much more image data compared to compressed formats like JPEG. Shooting in RAW allows you greater flexibility in post-processing, such as adjusting exposure, white balance, and recovering details in shadows and highlights. This empowers you to enhance image quality without compromising integrity.
Composition Matters: Frame with Finesse!
An eye-catching composition can elevate your image quality. Pay attention to leading lines, rule of thirds, symmetry, and other composition techniques to create visually appealing and impactful photographs.
FAQs about do camera lens protectors affect quality
Should we use a camera lens protector?
Absolutely! A lens protector shields your camera lens from scratches, dust, and damage, prolonging its life and maintaining image quality.
Do screen protectors affect camera quality?
Screen protectors are designed only for display devices and won’t impact camera quality.
Is it reasonable to put a lens protector on an iPhone?
Yes, it’s a smart move. An iPhone lens protector guards the camera lens against scratches and dirt, ensuring better image quality. High-quality protectors won’t affect the camera’s performance.
Conclusion
Cheap or low-quality protectors may be less optically transparent and can lead to reduced image sharpness or introduce unwanted artifacts.
Inferior lens protectors might cause additional reflections and flare when shooting in bright light or against direct light sources, which could degrade image contrast and color accuracy. We hope you know the answer to your question, do camera lens protectors affect quality?