Like many camera enthusiasts, you probably use a lens protector to protect your gear from dust, dirt, and damage. However, after years of use or if the lens protector has become scratched or damaged, you should remove it to clean the lens properly. But don’t worry – removing your camera lens protector doesn’t have to be complicated! In this blog post, we will discuss How To Remove A Camera Lens Protector with minimal impact on your gear.
To remove a camera lens protector, gently unscrew or unclip it from the lens, ensuring not to damage the lens or its threads.
How To Remove A Camera Lens Protector
If you own a DSLR camera, it is very important to keep the lens clean and protected. One way to do this is to use a camera lens protector. These are small, clear plastic covers that fit over the lens and help to keep fingerprints and other dirt off of the lens.
However, over time, the camera lens protector can become scratched or dirty and must be replaced. This article will show you how to remove a camera lens protector.
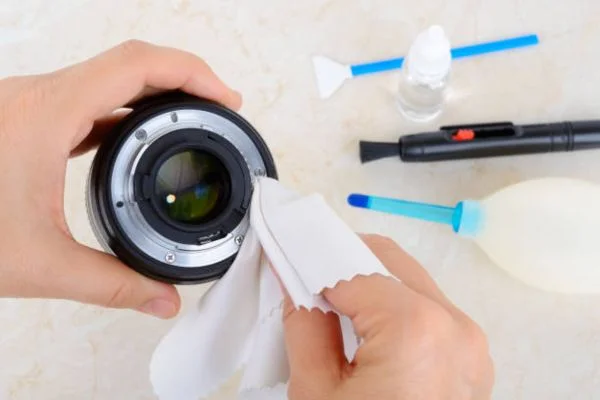
First, you will need to find a place to work with plenty of light. You will also need a lens cloth and some lens cleaning solution. Next, remove the lens cap and set it aside. Then, take a corner of the lens cloth and dampen it with the lens cleaning solution. Gently wipe the lens in a circular motion. Be sure to avoid touching the lens with your fingers.
Once the lens is clean, look at the camera lens protector. If it is scratched or dirty, it will need to be replaced. To remove the old protector, start by peeling back one corner. Slowly and carefully peel the protector off of the lens. If the protector is challenging to remove, you can use a small lens cleaning solution to help loosen it.
Once the old protector is off, look at the lens to ensure it is clean. If there are any smudges or fingerprints, you can clean them off with the lens cloth and lens cleaning solution. Then, align the new camera lens protector with the lens. Gently press the protector onto the lens. Make sure that the entire lens is covered.
Now that you know how to remove a camera lens protector, you can always keep your lens clean and protected. Be sure to replace the protector when it becomes scratched or dirty.
Also Read: How To Clean A Blurry Camera Lens?
Why You Should Remove Your Camera Lens Protector
Most digital cameras come with a clear, plastic lens protector that helps to keep the lens clean and free of scratches. However, this lens protector can do more harm than good. Here are a few reasons why you should remove your camera lens protector:
1. The lens protector can cause scratches on your camera lens.
2. The lens protector can cause the autofocus to misfire.
3. The lens protector can cause the image sensor to get dirty.
4. The lens protector can reduce the amount of light that reaches the sensor, resulting in poorer image quality.
5. The lens protector can make it more difficult to change lenses.
6. The lens protector can make it more difficult to clean the lens.
7. The lens protector can cause the camera to overheat.
8. The lens protector can interfere with the flash.
9. The lens protector can make it more difficult to use filters.
10. The lens protector can make using accessories such as teleconverters and extension tubes more challenging.
If you’re not convinced you should remove your camera lens protector, consider this: most professional photographers don’t use them, and they only leave them on their lenses sometimes. So why should you?
Also Read: How to Clean Backup Camera Lens?
How To Clean Your Camera Lens

Most digital cameras have a protective lens that can be removed if needed. To clean your camera lens, you must first remove the protective lens. Once the protective lens is removed, you can use a lens cloth to wipe away any fingerprints or smudges gently.
If your lens is filthy, you can use a lens cleaner solution and a lens brush. Be sure to follow the instructions on the lens cleaner solution to avoid damaging your camera lens.
How To Prevent Your Camera Lens From Getting Scratched
We all know the importance of keeping our camera lenses clean and free from scratches. But did you know that there are some easy ways to prevent your camera lens from getting scratched in the first place? Here are five tips to keep your camera lens looking like new:
Use a lens protector.
If you’re not using a lens protector, now is the time to start! A lens protector is a clear, plastic film that sticks to the front of your lens and protects it from scratches, fingerprints, and other debris. You can find lens protectors for popular camera models online or at your local store.
Keep your lens clean.
It’s essential to keep your lens clean both inside and out. Use a soft, dry cloth to wipe away any fingerprints or smudges on the surface of your lens.
Use a lens cleaning solution and a microfiber cloth to remove any dirt or grime for a deeper clean gently. Remember to clean the inside of your lens regularly to prevent dust and dirt buildup.
Handle your lens with care.
When you’re not using your camera, store your lens in a safe place where it won’t be bumped or dropped. Avoid placing your lens on rough surfaces like concrete or gravel. And always hold your lens by the edges or mount when attaching or removing it from your camera.
Be careful in dusty or sandy areas.
If you’re shooting in a dusty or sandy environment, take extra care to keep your lens clean. Dust and sand can easily scratch the surface of your lens, so be sure to clean it off as soon as possible. Consider using a lens hood to help keep dust and sand away from your lens.
Avoid using cleaning solutions with alcohol or ammonia.
When cleaning your lens, be sure to avoid using any cleaning solutions that contain alcohol or ammonia. These chemicals can damage the surface of your lens and cause it to become cloudy or discolored over time. Stick to lens cleaning solutions that are specifically designed for camera lenses.
By following these simple tips, you can help prevent your camera lens.
Also Read: How to Prevent Camera Lens from Fogging at Night?
Bottom Line
Now that you know how to remove a camera lens protector, remember to be gentle when detaching it from your lens. Remember to use a cloth or paper towel to not scratch the camera lens.
More importantly, remember to keep up with regular gear maintenance and do not rush the process. Taking care of your gear will ensure it functions for many years!
Always follow manufacturer instructions and only try to take apart pieces within what is instructed. You can also check online for helpful videos and tutorials on removing camera lens protectors safely.