You can add a touch of luxury and comfort to your bathroom with a heated towel rail. You can install a heated towel rail using some basic DIY skills and the right tools. We will walk you through step-by-step instructions regarding how to fit a heated towel rail in bathroom.
To fit a heated towel rail, select a location, turn off water, mount brackets, connect valves, hang rail, and if needed, connect to power. Test for leaks and function. Enjoy a cozy bathroom!
How To Fit A Heated Towel Rail In Bathroom | Pro Guide
Gather the Necessary Tools and Materials:
You will need the following materials and tools to complete the installation:
- Heated towel rail kit
- Mounting brackets
- Screws and wall plugs
- Spirit level
- Drill
- Pencil
- Tape measure
- Adjustable wrench
- Pipe cutter or hacksaw
- Pipe fittings (if necessary)
- Radiator valves (if not included in the kit)
- Teflon tape or jointing compound
- Towels or rags
- Plumbing sealant (if required)
Step 1: Plan the Location and Position
Choose the best location for your heated towel rail. For easy access, it’s usually near the shower or bath.
Make sure there is sufficient wall space for the towel rail, and consider the height and placement to maximize functionality. Mark the mounting brackets with a spirit level and pencil.
Step 2: Prepare the Plumbing
Turn off the water supply and drain the system if you connect the towel rail to the central heating system. Cut the pipes to the desired length with a pipe cutter or hacksaw.
To fit towel rail connections, install pipe fittings if necessary. Create a watertight seal by wrapping Teflon tape or applying a jointing compound to the threaded ends.
Step 3: Install the Mounting Brackets
Make pilot holes for the mounting brackets using a drill and the appropriate drill bit. If necessary, insert wall plugs into the holes. The mounting brackets should be screwed to the wall securely. Make sure they are level and aligned.
Step 4: Mount the Heated Towel Rail
Slide the heated towel rail onto the mounting brackets carefully. Ensure it fits snugly and is level. Check its alignment with a spirit level. To achieve the desired positioning, adjust the towel rail’s adjustable brackets.
Step 5: Connect the Plumbing
The supply and return pipes must be connected to the towel rail if it is connected to the central heating system. Tighten the fittings securely with an adjustable wrench. Make sure the connection is watertight. Install radiator valves if they are not included in the towel rail kit.
Step 6: Test for Leaks and Finish
Make sure the water supply is on and check for leaks. Tighten the fittings further or apply additional sealant if you notice leaks. Remove any excess water with towels or rags. Check for proper functioning after filling.
Step 7: Bleed the Radiator
Use a radiator key to open the air vent valve located at the highest point of the heated towel rail to remove trapped air. Let the air out until the water flows consistently. Once all the air is out, close the valve.
Step 8: Final Touches
After the towel rail is installed and functioning correctly, clean the surfaces, remove any protective covers, and make any adjustments needed. Admire your newly installed heated towel rail, ready to provide warmth and convenience.
Also Read: Can I Paint A Chrome Towel Rail?
Where Do You Put A Heated Towel Rail In A Bathroom?

There are a few key considerations when installing a heated towel rail in a bathroom to ensure optimal functionality and aesthetic appeal. Heated towel rails are commonly placed:
Near the Shower or Bath Area:
A heated towel rail is popular near the shower or bath. You can conveniently access warm towels by placing the towel rail near where you step out of the shower or bath. This placement allows you to easily reach the towel rail without walking across the bathroom.
Adjacent to the Vanity or Sink:
Next to the vanity or sink is another standard placement. While washing your face or hands, you can easily access warm towels. After use, towels can be hung conveniently for easy access.
Close to the Toilet Area:
The heated towel rail can be placed near the toilet in some bathrooms. Whether drying your hands or using it for personal hygiene, you can easily access a warm towel.
Also Read: Can A Heated Towel Rail Replace A Radiator?
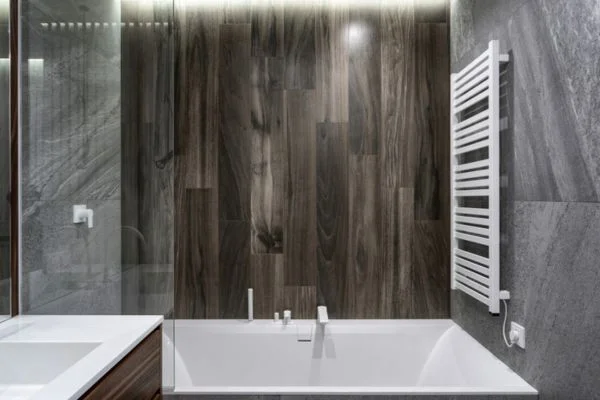
Alongside a Wall:
Installing the heated towel rail alongside a wall is an excellent option if your bathroom has limited wall space. Vertical placement maximizes wall space while maintaining towel rail functionality.
Underneath a Window:
It’s visually appealing to place a heated towel rail underneath a window in a bathroom. Placed this way, the room is elegant and takes advantage of unused wall space. In addition, it allows the towels to benefit from natural light and air circulation.
Customized Placement:
The placement of the heated towel rail depends on the layout and design of your bathroom. Consider the available wall space, power sources, plumbing connections, and overall flow and functionality. Towel rails should be installed at a height that allows easy access and optimal drying.
Consult the installation instructions provided by the manufacturer before finalizing the placement. Ensure a safe and efficient installation by considering the proximity to water sources and electrical safety guidelines.
Your heated towel rail can enhance your bathroom’s practicality and aesthetics while providing comfort and luxury for your guests.
Also Read: Can Heated Towel Rails Catch Fire?
Bottom Line:
Now you know, How To Fit A Heated Towel Rail In Bathroom. A heated towel rail in your bathroom can elevate both its functionality and aesthetic appeal. Using this step-by-step guide, you can install a heated towel rail and enjoy the luxury of warm towels.
Follow instructions carefully, prioritize safety, and seek professional assistance if necessary. You can enjoy a more comfortable and enjoyable bathroom experience with your new heated towel rail.


