If you are a fisherman, you know that proper crimping is essential to getting the best results out of your fishing experience. Crimping your line and bait correctly can make the difference between a successful outing and one where all you catch is frustration. To get the most out of your fishing trip, you must properly understand how to use a crimping tool. Let’s take a look at what crimping is, how it works and how to use a crimping tool for fishing.
What is Crimping?

Crimping tools connect two pieces of fishing line or attach a weight or bait to the end of your line. This connection helps keep the cable secure so it does not slip off during casting or reeling. It also helps create an airtight seal around the connection point so no water can penetrate and weaken the joint between lines or weights/bait.
Read more about How to Use a Lowrance Fish Finder for Better Fishing Results
How To Use A Crimping Tool For Fishing | Step-By-Step Procedure
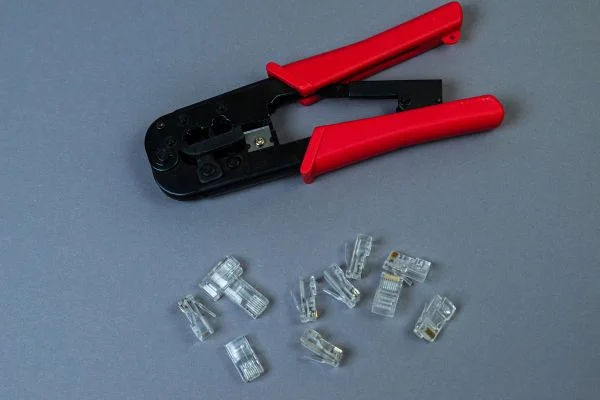
Step# Understanding the Crimping Tool:
In the world of fishing, crimping tools are essential pieces of equipment. Your fishing setup requires it to secure various tackle components, such as leaders, swivels, and sleeves. In most cases, the tool has two handles and a crimping head at the end. By compressing sleeves or crimps onto your fishing line, the crimping head creates a strong and dependable connection. During your fishing adventures, it is essential to keep your tackle intact and functional.
Step#2. Choosing the Right Crimps:
The selection of the right crimps for your fishing application is crucial. Metal components come in different sizes and materials, so it’s important to match them with your fishing line or leader’s diameter and material. Through this matching process, the crimps provide a secure connection without any weak points. Your fishing expedition will be successful if you use the right crimps.
Step#3. Preparing Your Leader:
Preparing your leader is the first step in using the crimping tool. First, cut the leader to the desired length, making sure the ends are clean and undamaged. Once the crimp has been placed on the leader, allow the line to loop through the crimp and overlap itself. Creating a secure connection begins with this initial preparation.
Step#4. Creating a Loop:
Having placed the crimp, it’s now time to create the loop. As well as attaching various tackle components, this loop allows movement during fishing activities. The loop should be large enough to accommodate the tackle components you plan to use, depending on your fishing needs.
Step#5. Inserting the Loop:
The looped end of the leader should be inserted carefully through the crimp. Keep an eye out for twists and tangles in the loop as it passes through the crimp. Your tackle components will be secured in place after this step.
Step#6. Positioning the Crimp:
The loop must now be positioned correctly within the crimping tool’s jaws once it has been threaded through the crimp. In order for your fishing setup to be flexible and mobile, the loop should be snug inside the crimp but not too tight.
Step#7. Crimping Process:
Don’t exert excessive force when crimping, but squeeze the handles firmly. The crimp should be compressed on the leader with steady pressure. A strong and reliable connection is created by securely fastening the components together. Leaders should not be over-crimped, as that could weaken them.
Step#8. Checking the Crimp:
Verify that the crimp is tightly secured around the leader, preventing any slippage. Additionally, tug the connection gently to ensure it is secure. A tackle setup is not complete without this step.
Step#9. Trim Excess Leader:
With fishing line clippers or scissors, trim any excess leader to ensure a neat and functional setup. Maintaining the strength and reliability of the connection requires precision during this step.
Step#10. Testing the Setup:
You should inspect your crimped tackle setup one last time before casting your line. Apply gentle pressure to the knots and connections to ensure that they hold securely. It’s time to embark on a successful fishing day with your well-prepared and correctly crimped tackle. Now you know how to use a crimping tool for fishing.
Read more about How To Use Cable Fishing Tool?
Things to Remember When Crimping
Regarding crimping, there are some essential things to keep in mind. First, ensure you have the right tools for the job. Using the wrong crimper or not having enough pressure on your crimps can lead to poor connections and reliability issues with your finished product.
You must also use high-quality components when crimping, as using inferior parts can cause electric shorts or unreliable connections when making contacts. To ensure a good connection, clean all parts before assembling them, and ensure they fit perfectly together with no wiggle room between them. Also, always double-check your work after completing each process step.
Another crucial tip is to avoid using excessive force when pressing down on the handle of a crimp tool; this can often result in damage or deformity of contact pins as well as softening of insulation material near contact areas resulting in electrical leakage. Instead, firmly press down from the start position until it stops at its maximum closing point, then slowly release it rather than suddenly letting go, so there is less chance of the terminal slipping out from its pre-set position during the strain relief operation stage.
Generally speaking, too much force may blow up components detrimentally due to overstress, which leads to overheating of terminal cap & loose connection, eventually knocking off the whole system stability & continuity desired at last results in failure due to short-circuiting & fire hazard threats through improper equipment handling conditions responsible by human negligence only!
Finally, be sure to inspect each final product thoroughly before placing it into service, i.e., HVAC mounting bracket harnesses that involve cable clamps/straps secured adequately into place should be mandatory without fail else will ultimately get fry while switching ON/OFF AC power supply regularly thereby subjecting end-user experience worse than expected outcomes ever time needlessly!!!
Read more about How To Use A Wire Fishing Tool?
Is it better to crimp or knot fishing line?
There are several factors to consider when choosing between crimping and knotting fishing line. For heavy-duty lines and big game fishing, crimping provides a secure and low-profile connection. It is quick, efficient, and maintains the strength of the line.
Knotting, on the other hand, is better suited to lighter lines and situations requiring flexibility. Improved clinch knots and Palomar knots are reliable and easy to tie. A finicky fish or delicate presentation may benefit from some movement allowed by these hooks. In the end, you should choose a line weight that fits your style of fishing, your fishing conditions, as well as the conditions in which you are fishing.
Bottom Line
Having an understanding of how to use a crimping tool for fishing properly can make all the difference when it comes to fishing success stories! With this knowledge in mind, anglers can more easily secure their lines, weights/baits together while ensuring airtight seals along their connection points – allowing them more control over their catches while also ensuring they stay safe on their adventures. These tips will allow even novice fishers to become confident in their ability to get exactly what they want from their next fishing trip!