A folding shovel is a great tool for various tasks, from gardening to camping to survival. Making folding shovel is relatively easy, requiring only a few supplies and basic carpentry skills. With your folding shovel, you’ll be prepared for anything life throws your way. So lets a look how to make a folding shovel.
What is Folding Shovel?
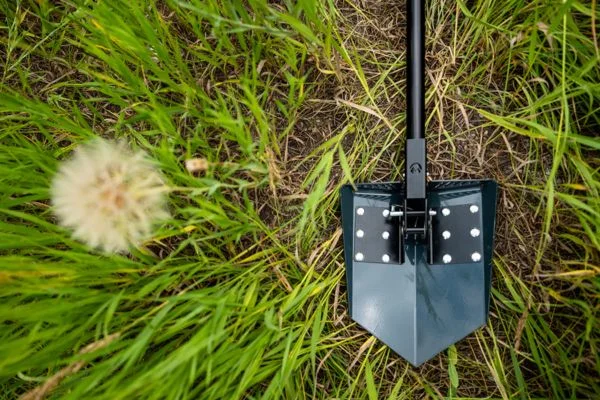
A folding shovel is a handy tool that can be used for various purposes. This tool can make your life much easier, from gardening to beach trips. The best part about a folding shovel is that it is small and compact, making it easy to store in your garage or shed.
Also Read: How To Use Folding Shovel On Camping Trip?
How To Make A Folding Shovel | Step By Step Procedure

Supplies Needed
-1/2 inch plywood (4 feet by 2 feet)
-Tape measure
-Ruler or a straight edge
-Circular saw
-Jigsaw
-Sandpaper (100 grit)
-Paint or varnish (optional)
-1 inch PVC pipe (10 feet long)
-PVC cutter or hacksaw
-2 PVC elbows
-4 PVC T fittings
-8 PVC end caps
-PVC glue
-Shovel blade (can be purchased at most hardware stores)
-12 bolts (1/4 inch by 2 1/2 inches)
-12 washers (1/4 inch)
Procedure
Folding shovels are a great invention that can make your life much easier. Here is a step-by-step guide on how to make one:
Step 1: Find a shovel you like the handle of. It needs to be made of durable material such as metal or hard plastic.
Step 2: Using a hacksaw, cut the shovel’s handle down to where it meets the blade.
Step 3: Next, bend two pieces of rebar so that they each make an L shape. These will be used as stays to hold the folding part of the shovel in place.
Step 4: If using MIG welding, weld these onto either side of the blade near where the handle was cut off. Ensure they are even with each other and perpendicular to the blade!
Step 5: If you are not using MIG welding, use JB Weld or another strong adhesive to adhere these onto either side of the blade near where the handle was cut off. Ensure they are even with each other and perpendicular to the blade! This needs to be temporary while we work on Step 5.
Step 6: Now it’s time to make some hinge cuts! On one side of the shovel, about 3 inches from where we placed our stays in Step 4, we will make two shallow cuts that will form a hinge when we open them up. The depth of your hinge cuts will determine how far back your folding shovel can fold – so keep that in mind as you make yours!
We recommend making your hinge cuts about 1/8th inch deep if you want a standard fold or 1/4 inch deep if you want a more dramatic fold (see pictures for reference).
Step 7: Once your hinge cuts have been made, open them up slightly so that there is now a gap between them. This gap will form our “hinge” when we close everything in Step 8.
Step 8: Almost done! Now it’s time to reattach our stays from Step 4 – but this time, we will do it with screws instead of welding or adhesive (we want our folding shovel to disassemble easily). Place screws on either side of each stay, ensuring they line up with pre-drilled holes on both sides of our hinge cuts from Step 5 (see pictures for reference).
And there you have it – your very own folding shovel!
Also Read: How Does A Folding Shovel Work?
Benefits Of Folding Shovel
Folding shovels are incredibly versatile and useful tools for a range of activities. Not only can they be used for gardening, but they also come in handy for camping, backpacking, fishing trips, handyman projects, and much more. Here are some of the many benefits of owning a folding shovel.
1) Compactness – Folding shovels are designed to fold up small, so you can store them easily in your car trunk or camping gear without taking up too much room. This is particularly handy when there is insufficient space to store bulky items such as spades and digging bars.
2) Portability – When folded up, folding shovels weigh significantly less than regular-sized spades making them easier to carry around when traveling to various destinations or while hiking on trails with limited resources nearby. It’s also possible to keep one in your pocket if needed!
3) Multi-Purpose Design – Unlike traditional spades, which have only been designed for digging purposes, folding shovels feature multi-purpose blades with other attachments such as saw blades which makes them suitable for more complex tasks like cutting through roots and branches during excavation projects or building fires in remote areas where stick gathering is difficult.
4) Durability – Most high-quality folding shovels boast stainless steel construction, making them extremely durable under different use conditions, including those associated with light vehicle traffic (caravans/trucks). They’re also relatively corrosion-resistant, meaning they should last longer than most standard outdoor garden tools, regardless of weather conditions.
5) Versatility – Depending on the model you purchase, some folding shovels contain an entire set of attachments, including screwdrivers and bottle openers, allowing you even greater versatility with different tasks compared to using traditional gardening tools alone when out camping or participating in outdoor activities such as geocaching or orienteering!
Overall, owning a folding shovel provides numerous advantages over regular gardening tools due to its compact size, source portability, and ability to carry out multiple functions simultaneously, thus providing users greater convenience during outdoor or indoor travels!
Also Read: Why Do You Need A Bucket And Shovel When Camping?
Bottom Line
Now that you know how to make a folding shovel, you can have one whenever necessary. Whether camping or gardening, this handy tool will come in useful. Be sure to keep it clean and dry to be ready for use when you need it most.