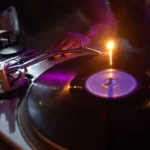
Do you love listening to vinyl records? There’s something about the sound quality and the nostalgic feeling that makes it an art form. But have you noticed a decline in audio quality lately? It might be time to change the needle on your record player. A record player needle, a stylus, is responsible for reading the grooves on a vinyl record and transmitting the sound into your speaker system. Over time, the needle can wear out or break, affecting the audio production quality. But fear not because changing the needle is a simple task that anyone can do at home. We’ll show you how to change needle on record player in this blog post.
To change the record player’s needle, simply follow these steps.
- Identify the type of needle
- Remove the old needle
- Install the new needle
- Calibrate the new needle
- Test the new needle
How To Change Needle On Record Player | Step By Step Procedure
Step 1. Identify the type of needle
The first step is identifying what type of needle your record player uses. Ceramic, diamond, and sapphire needles are the three types. Ceramic needles are the oldest type and are less durable than diamond needles.
The most popular type are diamond needles, which have excellent sound quality and can last up to 1000 hours. Sapphire needles are best for playing 78 RPM records.
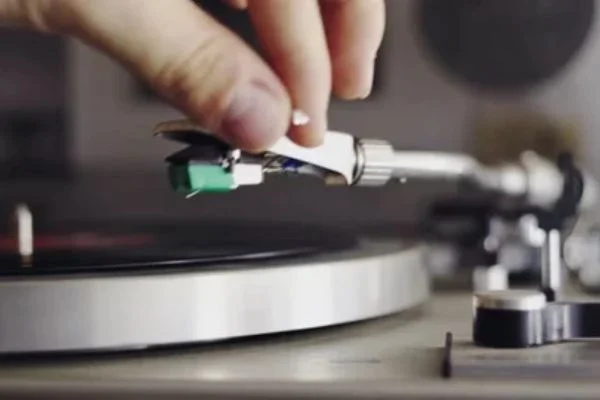
Step 2. Remove the old needle
To change the needle, you must remove the old one first. This is done by gently lifting the tonearm and sliding the old needle out of the cartridge. Hold the stylus by the metal part, not the plastic shank.
Step 3. Install the new needle
Now that you have removed the old needle, it’s time to install it. Make sure to align the new needle correctly with the cartridge. Use your fingers to place the needle into the cartridge slot carefully. Ensure the needle is in place properly and sits flush with the cartridge.
Step 4. Calibrate the new needle
After you have installed the new needle, it’s time to calibrate it. It is essential to get this step right to avoid damaging your records or equipment. Use a balance weight or a scale to ensure the tracking force is correct. This will help to prolong the life of your new needle.
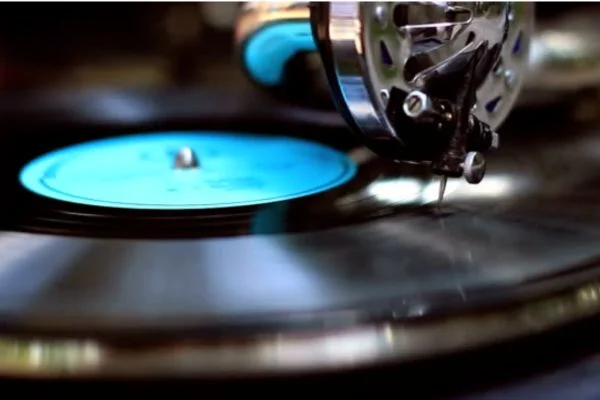
Step 5. Test the new needle
The last step is to test the new needle. Play a record and listen to the sound quality. If the audio quality is poor, ensure the needle is installed correctly, calibrated correctly, and adequately aligned. If you need clarification on the quality of the sound, you can take your record player to a specialist for assistance.
Also Read: How To Connect Record Player To Bluetooth Speakers?
How Often Do You Need To Replace A Record Needle?
The record needle, also known as a stylus, is responsible for reading the grooves of your vinyl records and producing sound.
However, like any other physical item, a record needle wears over time and eventually needs replacing. But how often should you replace it? Now let’s look at the signs indicating it’s time to replace your needle and how often you should replace it.
1. Signs That Indicate It’s Time To Replace Your Needle:
The quality of your audio is an excellent indicator of the health of your record needle. If you notice any distortions, a reduction in high-frequency sounds, or an increase in surface noise, it could indicate that your record needle is damaged and needs replacement.
The stylus tip wears out quickly and loses its shape and effectiveness. It can occur due to a buildup of debris on the needle that cannot be cleaned due to dirt and lack of maintenance.
2. How Often Should You Replace Your Record Needle?
It would be best not to use a specific fixed interval to replace your record needle. Depending on how often you play your records, how good they are, and what stylus you’re using.
Generally, some manufacturers recommend replacing your needle every 500-1000 hours of playtime or after approximately every 100 vinyl records. These figures are approximations and could vary depending on your stylus’ brand and model.
Also Read: How To Connect Edifier Speakers To Turntable?
3. Different Types Of Stylus:
There are two primary types of record stylus; Elliptical and conical/ spherical. As they have different shapes, they can possess different life cycles.
The elliptical stylus may last longer than the spherical stylus because it has a broader contact space with the record groove, and less pressure is applied to the needle’s tip.
Additionally, the conical stylus is built with a sharper needle tip, making it vulnerable to wearing off more rapidly comparatively.
4. Tips For Improving The Longevity Of Your Record Needle:
By taking preventative steps, you can extend the life of your record needle. Here are some tips for doing so:
- Store your vinyl records in an appropriate and clean space.
- Clean your record needle regularly with a specialized cleaning solution or a brush.
- Adjust the tracking weight to the manufacturer’s recommended settings.
Also Read: Why Is My Record Player So Quiet?
Bottom Line:
Changing the needle on your record player may seem daunting, but it is essential to maintaining the quality of your audio playback. We’ve got a step-by-step guide to help you understand how to change needle on record player.
Make sure you handle the needle carefully, identify the type, remove the old one, replace it, calibrate it, and test it. With these steps, you can ensure that your record player works optimally.