Car photography can be tricky, but it can create stunning images when done right. One of the most critical elements to consider is lighting. Getting the lighting just directly is essential to capture a car in its entire splendor. Here are some tips How to light a car for photography.
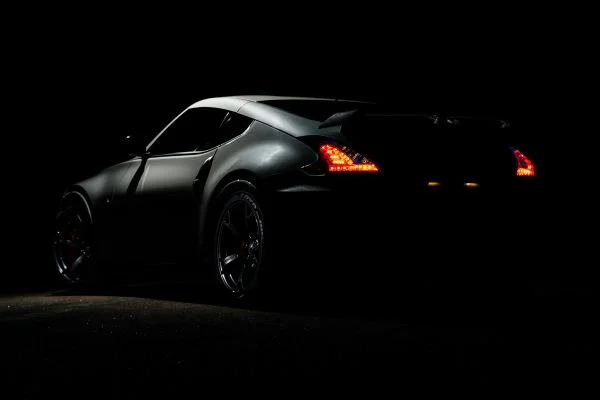
To light a car for photography, use natural light or soft, diffused artificial light. Position light sources to avoid harsh shadows and highlight the car’s contours.
How To Light A Car For Photography – Pro Tips
Natural Light Is Your Friend
Regarding car photography, natural light is often your best friend. The sun will provide ample light that you won’t need to worry about setting up lights or using flashes. However, there are certain times when the sun just isn’t enough, so you should always have some artificial lighting on hand.
Know Your Light Sources
Knowing which light sources work best for car photography can make all the difference in how professional your images look. A mix of natural and artificial lighting is usually recommended, giving you more control over how shadows are cast across the vehicle.
If you’re working with natural light only, try to choose times when the sun is at its lowest point in the sky—this will soften any harsh shadows that might appear on your subject matter during midday hours.
Use Reflectors and Diffusers
Reflectors and diffusers are great tools for controlling the intensity of your light source and ensuring that you get even coverage across your subject matter. Reflectors come in different sizes and colors, so you can choose one depending on what effect you’re looking for and how much space you have available in your studio or outdoor shooting area.
Diffusers help soften hard shadows by diffusing light from any given direction, resulting in a softer image overall.
Also Read: How Much Do Car Dealerships Pay For Photography?
What Camera Setting For Car Photography?

Cars and photography have always made the perfect duo, catching the eyes of car enthusiasts and photographers alike. Taking a stunning photograph of a car requires professional skills.
But with the correct camera settings, even a beginner can capture amazing shots. In this section, we’ll dive into the basic camera settings you should consider when aiming to take jaw-dropping car photos.
Aperture: The Key to Depth of Field
When shooting cars, it’s essential to control the depth of field—the area in the photo that’s in focus. This is where the aperture comes into play. The aperture is the opening in your camera’s lens that controls how much light enters the camera.
A larger aperture (smaller f-number) will create a shallower depth of field, while a smaller gap (larger f-number) will result in a more significant depth of field. Generally, for car photography, an aperture of f/8 to f/11 is a good starting point for sharp focus and sufficient depth of field.
Shutter Speed: Capturing Motion
Capturing the right motion in your car photographs can make all the difference between a dynamic, action-packed shot and a bland, still image. Shutter speed is the time the camera’s shutter remains open, determining how much light gets recorded onto the sensor. The faster the shutter speed, the less motion blur.
For stationary cars, a shutter speed of around 1/125 to 1/200 should do the trick. However, you’re photographing a moving car. In that case, you should use a faster shutter speed or experiment with panning, which involves moving the camera along with the car’s motion to keep the subject sharp while blurring the background.
Also Read: Are Mirrorless Cameras Good For Photography?
ISO: Balancing Light and Noise
ISO is the sensitivity of your camera’s sensor to light. Setting the correct ISO is crucial for car photography, as a high ISO will increase your photo’s noise (graininess).
At the same time, a low ISO often results in better image quality. Ideally, you want to use the lowest possible ISO that provides sufficient brightness for your photos.
This will depend on the available light, but in general, ISO 100 to 200 would be a good starting point for outdoor shooting and around ISO 400 to 800 for indoors or under low light conditions.
White Balance: Keeping Colors Accurate
White balance ensures that the colors in your photos appear as natural and accurate as possible. It often goes overlooked, but it can significantly impact your car’s appearance in the final image. When shooting outdoors, a cloudy or shade setting for white balance can help maintain the car’s true colors, avoiding unwanted color casts.
If you’re shooting indoors, consider using a custom white balance setting if there is a mix of light sources, or match the white balance setting to the light source, such as tungsten or fluorescent lighting.
Focusing: Ensuring Sharpness
The focus is another critical aspect of car photography. Typically, the most striking car photos have a clear subject, whether the entire vehicle or a specific detail like a car emblem, wheel, or headlight.
Using your camera’s autofocus is often sufficient for getting sharp images. But you may want to experiment with manual focus if you need help to get the desired effect. Remember to choose the focusing mode that best suits your situation, such as single-point autofocus for stationary cars or continuous autofocus when shooting moving vehicles.
Also Read: What Kind Of Camera Should I Use For Concert Photography?
Bottom Line:
So how to light a car for photography? With these simple tips, nailing car photography lighting should become second nature! Remember to consider natural and artificial sources; experiment with reflectors and diffusers; know when to use them; keep an eye out for harsh shadows; and be aware of different angles that may affect how light falls over your subject matter. With practice, you’ll soon be able to photograph cars with ease and confidently


