Are you looking for an efficient, cost-effective way to run cables through walls, ceilings, or other tight spaces? If so, then a wire fishing tool is the perfect solution. This handy tool can save you time, money, and energy when running cables through hard-to-reach areas. Read on to learn how to use a wire fishing tool like a pro.
The Basics of Wire Fishing Tools
Wire fishing tools are specially designed tools that allow you to easily fish out long lengths of cable or wires from different locations. They consist of two parts – a handle with a trigger and the wire itself. The handle guides the wire while the trigger releases the tension when it reaches its destination. The wire is usually made of steel or carbon fiber and is flexible enough to move around corners and other tight spaces.
How To Use A Wire Fishing Tool | Pro Guide

Step 1: Prepare Your Work Area
The first step is ensuring your workspace is clean and organized. This will help ensure that all your tools are easy to find when it’s time to start working with them. Remove any debris from the space where the wire will be installed and any potential obstacles that could interfere with the installation process.
Also, ensure that there are no people or pets in the vicinity who could be harmed by tools or debris during your project.
Step 2: Select The Right Wire Fishing Tool
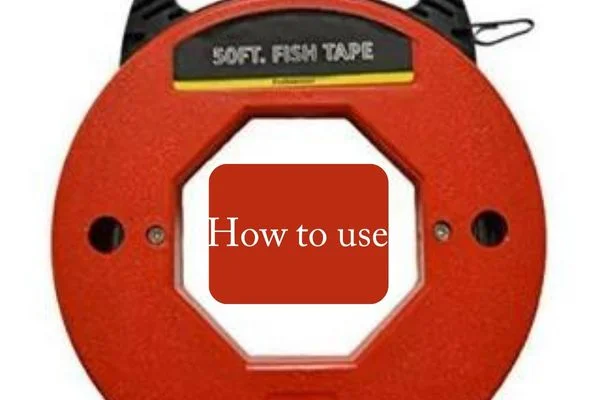
Once your work area is prepared, it’s time to select the correct wire fishing tool for the job. The most common type of wire fishing tool is a fish tape, a long metal ribbon with a hook on one end and an eyelet on the other. These tools can be used in tight spaces where traditional wires cannot be run due to obstructions or bends in the walls or ceilings.
Other types of wire fishing tools include snake rods and drill bits which can also help guide wires through tight spaces but require more skill and experience than fish tapes to use correctly.
Step 3: Attach The Wire To The Fish Tape
Once you have selected your wire fishing tool, attach one end of the wire securely around the eyelet of the fish tape using electrical tape or another secure method such as crimping pliers or soldering equipment if necessary. Ensure that the connection is strong enough not to come loose during operation.
After attaching one end of the wire, feed it through your chosen route until it reaches its destination point – this could be through walls, ceilings, or floor joists, depending on what type of space you are working in.
Step 4: Pull The Wire Through The Route
Once both ends of the wire have been connected securely, use a pull string attached to either end of your fish tape (or any other pulling device) to pull it through its designated route until it reaches its final destination. At this point, it can be cut off with scissors if necessary. Be sure not to tug too hard when pulling, as this may cause damage either to yourself or any objects along its path!
Be sure not to exceed any weight limits specified by manufacturer guidelines when pulling larger cables, as these may cause damage during installation too!
Read more about How To Use Cable Fishing Tool?
Tips for Successful Wire Fishing
After knowing how to use a wire fishing tool, You need to take some additional tips for a successful process.
Plan Your Route: Draw out the path your wires will follow, taking obstacles and bends into account.
Use Proper Tools: Make the job easier and more efficient by investing in quality fish tapes, rods, and hooks.
Label and Bundle Wires: Label your wires and bundle them together to prevent tangling.
Patience is Key: Be careful not to damage wires or get stuck in tight spaces.
Safety First: Turn off power before fishing wires, and wear protective gear to prevent injuries.
Read more about How To Build Your Own Wire Bending Tool For Fishing?
How do you use a wire snake tool?
Cable snakes and fish tapes are handy tools used in electrical work and DIY projects to route wires through conduits, walls, and ceilings. You can use it effectively by following these steps:
Step#1. Preparation:

Be sure you have the necessary safety equipment, such as gloves and safety goggles, before starting. Identify the route where the wire will run and make sure it’s free of obstructions.
Step#2. Unrolling the Wire Snake:
You must unroll the coiled wire by holding the handle of the wire snake. The end of the wire snake should not be tangled and should be free. Typically, a wire snake consists of a flat, flexible metal strip or coiled wire enclosed in a plastic or fiberglass shell.
Step#3. Attaching the Wire:
Route the wire by attaching it to the end of the wire snake. You can either bend it back on itself or use tape to secure it tightly. While feeding the wire through the conduit, this prevents it from slipping off.
Step#4. Feeding the Wire:
The wire snake with the attached wire should be inserted into the conduit or opening. Using a twisting motion if necessary, push and guide it gently. Avoid forcing it, as this may damage the wire or cause it to become stuck.
Step#5. Navigating Obstacles:
Utilize a slow, careful maneuvering technique when encountering bends or obstacles in the conduit. To help the wire snake navigate corners or tight spots, twist it or move it slightly from side to side.
Step#6. Retrieving the Wire:
After threading the wire through to the desired location, carefully remove it from the wire snake. Alternatively, you can simply unwind the wire using pliers.
Step#7. Testing and Securing:
Test your wiring for continuity before finalizing the installation. Secure the wire using clips or appropriate fasteners once it has been confirmed that it will not move or be damaged.
Bottom Line
Now you have a proper idea about how to use a wire fishing tool. Using a wire fishing tool is an effective and affordable way to run cables through walls, ceilings, or other hard-to-reach areas quickly and easily. With some practice and patience—and following these step-by-step instructions—you’ll be able to set up complex wiring systems without breaking a sweat! So don’t wait any longer—start using your new wire fishing tool today!


