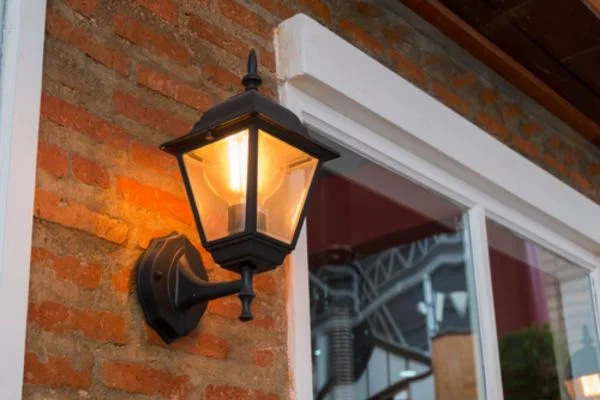
How to install outdoor Light Fixture on Stone? If you are looking to improve the look of your outdoor living space, one way to do so is by installing an outdoor light fixture on stone.
Installing outdoor lighting can create a warm and inviting atmosphere while providing safety and security. This article will provide detailed instructions on how to install an outdoor light fixture on stone.
How To Install Outdoor Light Fixture On Stone | Pro Guide

Step 1: Tools & Supplies
Before you begin, it is important to gather all the tools and supplies for how to install outdoor light fixture on stone that you will need for installation. This includes
Power Drill:
A power drill is essential for drilling the holes into the stone that will be necessary to attach the mounting bracket.
Masonry Bit:
The masonry bit is designed specifically for drilling through stone and concrete surfaces. It is important to select a bit that is of appropriate size and strength for your specific application.
Mounting Bracket:
The mounting bracket is used to attach the light fixture to the stone. It should be made of durable material, such as stainless steel, to ensure it can withstand extreme weather conditions.
Wire Connectors & Screws:
Wire connectors and screws are required for attaching the mounting bracket and other components of the light fixture to the stone. It is important to select the right size and strength of screws and wire connectors for the job.
Also Read: How To Waterproof Outdoor Lights?
Step 2: Measure & Mark
Once you have gathered your tools and supplies, measure the area where you want to install the light fixture and mark it with a pencil. This will help you determine the exact placement of your light fixture.
Step 3: Drill Holes in Stone
Next, you will need to drill holes into the stone at each of your marked locations, using the appropriate-sized masonry bit. Make sure that the drill is firmly pressed against the stone as you work to ensure a more secure installation.
How to drill:
1. Position the drill bit at the marked location and press firmly against the stone.
2. Slowly begin to drill into the stone, using steady pressure.
3. Once you have drilled a few centimeters deep, stop and check to ensure that your drill is still positioned correctly and that there is no debris in the hole from drilling.
4. When you are satisfied with your progress, continue drilling until the hole is deep enough to accommodate the screws and other components of the installation.
Step 4: Secure the Mounting Bracket
Once all your holes are drilled, place the mounting bracket in position over the drilled holes and secure it with screws. Make sure to use a power drill to drive these screws into the stone for a more secure hold.
Step 5: Connect Wires
Now you need to connect wires from your light fixture to the wiring that runs to your power source. This can be done by using wire connectors to ensure an electrical connection between your light fixture and power source.
Step 6: Special Considerations
Following are the special considerations for how to install outdoor light fixture on stone:
Stone Types
When working with stone, it is important to consider the type of stone you are installing your light fixture on. Different types of stone require different tools and techniques for installation, so make sure you use the appropriate drill bit and mounting bracket for maximum security.
Weather & Moisture Resistance
It is also important to consider weather and moisture resistance when installing your light fixture. Make sure that you choose fixtures that are specifically designed for outdoor use and can handle extreme temperatures, rain and wind.
Also Read: How To Set a Timer For Outdoor Lights?
Safety Guide
Before you begin your installation, it is important to take safety measures and follow all necessary precautions for a safe installation process.
Turn Off the Power Source:
The first and most important step is to turn off the power at the breaker box before you start working on your outdoor light fixture. This will ensure that no one gets electrocuted or injured in the process.
Use Protective Gear:
It is also important to wear protective gear such as long pants, gloves, and eye protection when drilling into hard surfaces, such as stone. This will help protect you from any flying debris that may be created during the installation process.
Secure the Fixture:
Once the light fixture is connected to the power source, make sure that it is securely fastened to the wall. This will ensure that it does not fall off or become loose once it has been turned on.
Also Read: How To Tell If Your Outdoor Lights Are Motion Sensor
Conclusion
How to install outdoor Light Fixture on Stone? Installing an outdoor light fixture on stone may seem intimidating, but with the right tools and supplies, it is a relatively straightforward task.
Following the above steps, you should be able to install an outdoor light fixture on stone in no time. Once your light fixture is installed, you can enjoy the soft glow of your outdoor lighting for years to come.
Thank you for reading! I hope this article was helpful in providing detailed instructions on how to install an outdoor light fixture on stone. Good luck


