Cable fishing tools are essential for anyone who deals with electrical wiring and installation. It’s a great way to save time and money when running cables through walls, ceilings, or other hard-to-reach places. If you’re new to using this type of tool, then this article is here to help! Read on for our guide on how to use cable fishing tool.
How Does it Work?
A cable fishing tool (also known as an electrician’s snake) is used to retrieve objects from hard-to-reach areas, such as behind walls and in ducts. It sends a steel wire or fiberglass strand with a grabber mechanism attached to the end. The grabber can be triggered to close, trap, and retrieve the object when it reaches its target. Electricians commonly use cable fishing tools to remove cables stuck in tight spaces, enabling them to safely and quickly re-access them.

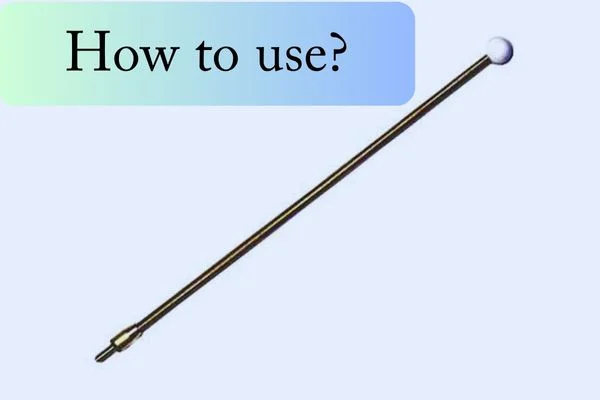
The tool has two main parts: a flexible shaft and a grabbing head. The flexible shaft typically houses either a stainless steel or fiberglass core allowing it to bend around corners so that it can reach into even the most inaccessible of places, including walls and ceilings; meanwhile, at one end of this shaft is attached an extended grabbing head consisting of two arms which are designed to close when something comes between them once they reach their target area. The arms may also contain serrated edges enabling them to catch onto smooth surfaces such as plastic tubing or electrical wires that may otherwise be too slippery for common gripping mechanisms.
When using this type of tool, there are some safety measures you should take beforehand — firstly, make sure you’re wearing appropriate safety gear such as gloves and eye protection; secondly, unplug any power sources near where you’ll be operating your cable fishing tool; finally, always use caution when maneuvering your device as its metallic construction can easily cause damage if mishandled during operation.
Overall, cable fishing tools provide electricians with safe solutions for retrieving objects from difficult locations without sacrificing time or putting themselves at risk – making them significantly quicker than manual methods while still ensuring accuracy each time they’re employed!
Read more about Wire Forming Tool For Lure Making: Craft Perfect Fishing Baits with Ease
How To Use Cable Fishing Tool: Step By Step Guide
Step#1 Gathering Your Tools
The first step in using a cable fishing tool is to assemble the necessary equipment. Fish tape, fish rods, and a flashlight are usually included in a cable fishing tool kit. For your specific project, make sure to have the appropriate cables and connectors.
Step#2 Planning Your Route
Take a moment to plan your cable route before diving in. Determine where it needs to go, the entry and exit points, and any obstacles or obstructions. Ensure you have enough fish tape or rods to reach your destination without any problems by measuring the distance carefully.
Step#3 Preparing the Fish Tape or Rods
To prevent kinks, extend fish tape only as far as necessary, but avoid overextending. Either tape or a specialized attachment should be used to secure the cable to the fish tape. Assemble fish rods to reach the required length for your task if you are using fish rods.
Step#4 Inserting the Cable
The fish tape or rods should now be carefully inserted into the entry point, guiding them through the conduit or wall cavity. The cable must be handled carefully during this step in order to avoid getting snagged or bent.
Step#5 Monitoring Progress
If someone is watching for the fish at the exit point as you feed them tape or rods, it will be helpful to feed them. To help you track the cable in dimly lit areas, use a flashlight.
Step#6 Retrieving the Cable
When the fish tape or rods reach the exit point, carefully pull them through while ensuring the cable flows smoothly. Avoid tangles and damage to the cable during this process.
Step#7 Securing the Cable
Use clips, staples, or cable ties to secure the cable in place after it has been pulled through. Cables should follow a straight path and not create sharp bends or stress points that could cause damage over time.
Step#8 Testing Connectivity
You should test the cable’s connectivity before you consider your project complete. During this step, you verify that your electrical or network connection works correctly after cable installation. Testing is essential after knowing how to use cable fishing tool.
Read more about How to Use a Lowrance Fish Finder for Better Fishing Results
How do you fish a cable through a pipe?
You can easily fish a cable through a pipe if you pay attention. Here is a step-by-step guide to help you. The steps are as follows:
Step#1. Gather Your Tools

Start by gathering the tools and materials you will need. To make the process go more smoothly, you’ll need a fish tape or wire snake, electrical tape, a flashlight, and ideally, a helper. Your cable should be the right size and type for the pipe you intend to pull through.
Step#2. Prepare the Pipe
Inspect the pipe thoroughly before threading the cable. Clear the pipe of debris or obstructions that could hinder cable passage. Be careful to avoid causing damage to the cable by pulling it with sharp edges or burrs. For a successful cable installation, it is crucial to have a clean, obstacle-free pipe.
Step#3. Attach the Cable Securely
The cable should be securely fastened to the fish tape or wire snake using electrical tape. It is important to ensure that the connection is tight and won’t come apart during pulling. Cables moving through pipes are more likely to snag or hang up if the connection is smooth.
Step#4. Feed the Cable into the Pipe
The fish tape or wire snake should be carefully inserted into the pipe’s opening with your helper at the other end. To navigate the tape or snake through any bends or obstacles it encounters, use a flashlight to monitor its progress.
Step#5. Maintain Communication with Your Helper
Communicating continuously with your helper is essential. You should guide the fish tape or wire snake from the entry point into the pipe steadily. Preventing kinks, snags, or cable damage requires proper tension on the tape or snake.
Step#6. Pull the Cable Through
Upon emergence from the opposite end of the pipe, carefully pull the fish tape or wire snake through. The cable should follow smoothly without twisting or tying. When removing the cable, use a consistent, gentle force to avoid damaging it.
Step#7. Secure the Cable in Place
Once the cable has been pulled through successfully, detach it from the fish tape or wire snake. If there is any excess slack inside the pipe, use clips, straps, or fasteners to prevent future movement or damage.
Step#8. Test the Cable Connection
Check the cable connection before you complete your installation to ensure it is functioning properly. Look for any bends or damage that may have occurred during pulling the cable.
Read more about How To Set Up A Pole For Trout Fishing?
How do you use wire fish tape?
The process of using wire fish tape is straightforward. In order to start your wire, you must first determine where it will start. Then, securely attach the wire or cable to the fish tape. After inserting the fish tape into the conduit or wall opening, guide it as you push it through. For the tape not to get stuck or kinked, it’s essential to maintain steady pressure and avoid bending it sharply.
As you feed the fish tape, have a partner assist you by watching at the exit point and guiding the wire so that it follows the correct path. When you’ve reached your destination, carefully pull the fish tape back, bringing the wire with it. When dealing with tight spaces or multiple bends in the conduit, remember to be patient and methodical.
Bottom Line
Now you know how to use cable fishing tool. Using cable fishing tools makes running wires and cables through walls and ceilings much more accessible than doing so by hand! This guide should give you an overview of how these tools work so you can confidently tackle those tricky wiring jobs easily. So what are you waiting for? Get out there and get connected today!


